How to make easy and beautiful engraved ornaments for the Christmas tree

It's Christmas time, the most magical time of the year. The lights are on, the decorations are up and it's time to get into the holiday spirit. What is more, you have an opportunity to take some time out from the hustle and bustle of the day-to-day life, and to focus on something else: creativity!
With the advent of the holidays, it is important to make sure that your house looks festive and beautiful. There are many ways to do this, but one of the most popular ways is to make personalized ornaments for your tree. Making Christmas ornaments is a fun activity that can be done by anyone, and provides a way to relax and have fun while also getting your creative juices flowing.
This is one of the best times for artists because there are so many DIY projects that you can do with your family and friends!
Christmas tree ornaments are a must-have for any Christmas tree decorating project. These ornaments may vary from traditional to modern designs - from snowflakes to stars, angels and reindeer!
All in all, this blog will teach you how to make your own engraved Christmas ornaments. It will show you step-by-step how to create a personalized ornament that you can give as a gift or keep for yourself.
Let’s get to it!
WHAT YOU NEED
Materials
- Acrylic blanks- Painter’s tape
- Stencils (or your own designs)
Tools
STEP 1

First of all, put on your non-skid gloves and a mask. Your safety is essential.
Then, you will need the acrylic blanks that you will engrave. The thickness may vary, but I recommend 1/6 inch blanks for this project.
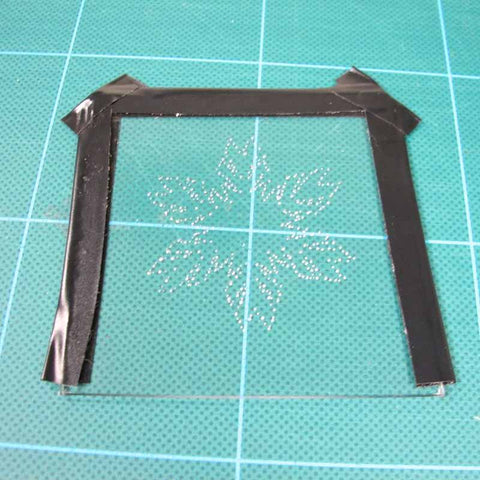
Place the wooden blank onto your cutting mat, centering it. Add painter’s tape to the edges, making sure not to cover the parts you want to engrave.
STEP 2
Choose your design. You can use some holiday stencils or practice free-hand engraving. Anything goes!

After choosing your design, you will have to choose the right bit for the project. For this one, we used Culiau’s engraving pen, the Customizer, which comes with 30 bits for free.
For precision work, these are the best bits:

For a medium stroke, not very deep, these are the bits you need:

If the design doesn’t need precise work, we recommend you use these ones:

STEP 3

Carefully, start engraving with your engraving pen. Once your design is engraved, remove the painter’s tape from the edges of your wood blank. Then, clean it with a dry cloth and use a polishing bit to give it a nice finish.
STEP 4
Display it on your tree for everyone to see!

And that’s it! Easy as pie!
Christmas is one of the most important holidays in the calendar, and it is always celebrated with a lot of joy.
In this blog, we taught how to simply engrave wood ornaments for your tree. We have given you a few tips and tricks on how to make your own wooden ornaments. You can also use these tips for any other type of ornament that you would like to engrave.
MERRY CHRISTMAS!


1 comment
Looking forward to using this pen on some of my projects🙌😻🙆